In my 13 years of installing security cameras, I’ve gained a lot of expertise that allows me to explain and show you the ideal places to place your camera in your home for proper perimeter coverage.
Installing security cameras may appear to be a difficult prospect to those who are unfamiliar with DIY technology. Don’t be concerned!
That’s how it felt for us at first. Not only are we experts now, but we also execute these hands-on initiatives on a regular basis. In fact, the vast majority of smart home security cameras now allow for self-installation, which means we set it up ourselves rather than engaging a professional.
Installation varies in complexity depending on where we want to position the camera and its power supply that is the plug-in or battery.
Naturally, the installation procedure differs based on the manufacturer and model. However, after putting hundreds of home security cameras through their paces, we’ve learned a thing or two about it. While each camera has its own set of instructions, we’ve compiled a list of best practices for installing home security cameras.
Placing Your Home Security Cameras
Living Room
Garage
The first stage in installation is selecting where we want our security cameras to be placed. Before making any purchases, we should ideally decide where the camera(s) will be positioned.
This allows us to assess how many cameras are needed to cover the house, how long an extension cord is needed, and whether or not you will need to rely on batteries. We already wrote a whole essay about where to put security cameras in our homes. Here’s a quick rundown.
Placing Cameras With Hubs
D-link-xt2-camera-review
The D-Link Sync Module
When using cameras that require a hub, keep the camera at a safe distance from the hub so that it can connect to Wi-Fi or another kind of connectivity smoothly. For example, in order to connect via the router Home app, the D-Link XT2 must be within 100 feet of the Sync Modules.
If the camera does not include a hub, ensure that it is close enough to the router or range extender to receive a reliable internet connection and speed.
If everything else fails, purchase a Wi-Fi range extender.
Installing Security Cameras Indoors
Cameras for Indoor Security
It is better to install inside security cameras on your home’s first story.
If you have more than one floor, attempt to install cameras in common areas such as the main hallway or living room. In such cases, you have a better chance of capturing perpetrators’ faces, making it easier to bring them to justice.
Install a camera directly outside the master bedroom, as this is where most valuables are kept.
Install the camera in an inaccessible location so that an intruder (or even a mischievous tween) cannot simply break or deactivate it. This is especially critical with cameras that save their footage on an internal memory card. Basically, every location where robbers can gain access through doors or windows should be secured.
Place cameras in corners for the greatest potential field of vision.
Install cameras on the staircase to track intruders within your home.
ADT Blue Indoor Camera Video High Definition
ADT Blue Indoor Camera, positioned to view the entire room
We do not, however, propose installing security cameras in bedrooms or bathrooms, as this can significantly damage privacy. Keep in mind that most indoor cameras do not operate through glass since it interferes with heat-based motion detection.
If you want to watch the outside of your house, there is a simple solution: there are numerous weather-resistant outdoor cameras available, which leads us to our next point.
Placing Outdoor Security Cameras
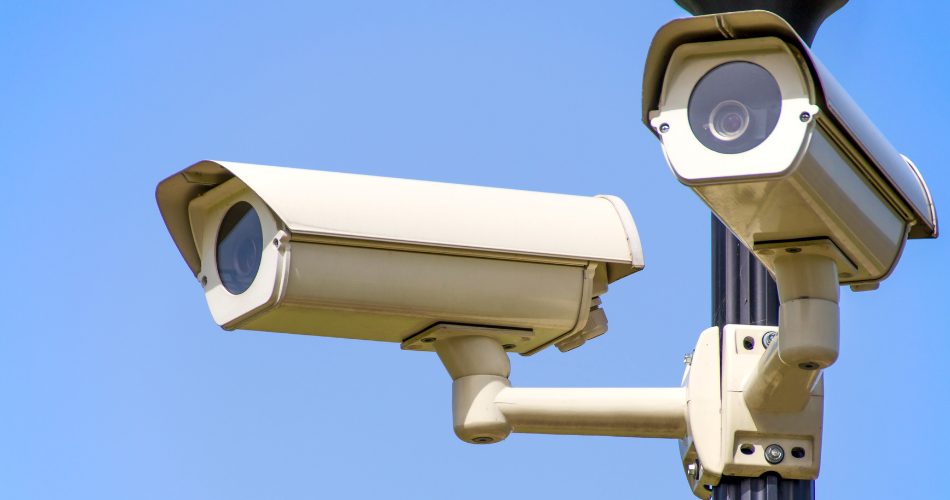
Outdoor Security Cameras
Outdoor cameras should be installed at the majority, if not all, of your home’s access and exit points. Your front and back doors, at the absolute least, should be protected.
Install exterior cameras in off-street windows, as robbers are more likely to enter through side or back windows than the front.
You should install cameras in your driveway, yard, and backyard.
To respect your neighbors’ privacy, avoid recording anything other than your own property. While it is crucial to keep an eye on your neighbors,secretly recording their daily comings and goings puts the “nosy” in nosy neighbors. This is likewise illegal and infringes on their Fourth Amendment rights.
Installing an outdoor camera is typically more difficult than installing an inside camera, especially if it plugs into a power outlet. It is possible that you will need to utilize an outdoor plug or snake it into your home in some way. Another option is to hardwire the camera into your home.
Wireless cameras are typically simple to install, whether they are wireless interior or Outdoor wireless cameras Of course, if you use batteries, keep track of them. how long they typically last and when they need to be replaced. Nonetheless, with a battery-powered camera, your camera will remain operational during power outages.
Whatever the case, interior cameras necessitate careful consideration of placement alternatives prior to purchasing of the camera.
Camera Placement and Video Quality of the Outdoor Cam
A lot of people often ask if security cameras discourage crime or if they are a waste of money. For me I know it help discourage a lot of crime when they know there is a security coverage arround. One of the most common and widely agreed-upon comments was that if the burglars noticed cameras on the premises, they would reconsider robbing the business. As a result, some experts propose putting one visible camera as well as some covert gadgets.
Here are a few more tips we use when installing exterior cameras:
Keep away from direct sunlight. While we prefer indirect light for our outdoor cameras, keep in mind that direct/bright light produces glare and color distortion. To avoid this, Examine the areas where you want to place your cameras for the quantity of light they receive at various times of the day. before mounting them.
Take note of any direct light sources, such as the sun, lampposts, or anything else that can generate a glare in your footage. If you discover a problem, change the camera’s planned location just enough to avoid direct light.
Make allowances for blind spots. Blind spots in your security system, like blind spots in your car, cause you to miss vital information. In an ideal world, we’d all have security cameras with extremely wide-angle fields of view and the ability to see far away. Consider each camera’s range of view and do the math to guarantee that all of the areas around your property are covered, with no obstructions to the lines of sight.
Consider detached structures. We frequently neglect to take footage of independent or adjacent buildings to our homes, such as garages, greenhouses, or sheds. It is critical to install cameras in and around these structures.
How To Install Security Cameras
Installing the Scout Indoor Camera
Have you decided where you want to put your camera? It is now time to install. We choose to install our home security cameras in stages. Because every camera is different, it’s critical to follow the manufacturer’s instructions, but the steps below are excellent starting points to keep you on track:
After you’ve bought and acquired new security cameras, plan out and draw a schematic of where you’ll put them inside and outside your home.
After you’ve decided where you want your cameras, transport them there, loosely/temporarily install them with a little nail or tape, turn them on, and short test them. If the cameras’ function, proceed to permanently mount them according to your original diagram. If they don’t function, you won’t have wasted your time installing goods that you’ll have to uninstall right away.
After installing the security cameras, use your mobile app or PC to access the livestream video feed.
Configure your settings, such as motion sensitivity and brightness.
Check that everything is in working order.
The parts that follow go into greater into regarding installing various types of security cameras.
Installing Wireless Security Cameras
Installing the D-Link-vision Camera
Mount the camera or simply set it on a flat surface. Mount the camera with drills, most cameras come with the appropriate mounts.
Wi-Fi connect the camera to the internet.
Sync it with any other connected devices with which it is compatible, such as smart sensors or video doorbells.
Most DIY installation processes now include step-by-step instructions in their respective mobile apps, which we recommend following precisely.
Installing Wired Security Cameras
While wired security cameras provide fewer installation possibilities, the connections are more secure. Installing wired cameras, on the other hand, can be a bit more difficult.
It should be hardwired into your home. Drill holes for each camera, run cables to each camera, and then install each camera.
When mounting a camera to a wall or ceiling, make sure the location is solid, which may necessitate the use of drywall screws or the discovery of a stud.
Before drilling, always check for any existing wiring to avoid causing any electrical concerns.
Mark and drill holes for cables.
Run the wiring.
Mount the camera.
Alternatively, you may be able to connect in and attach the camera.
Some cameras include DVRs, which you may connect to using an Ethernet cable or a power adapter.